Tuesday, May 5, 2015

Badam(Almond) Halwa..


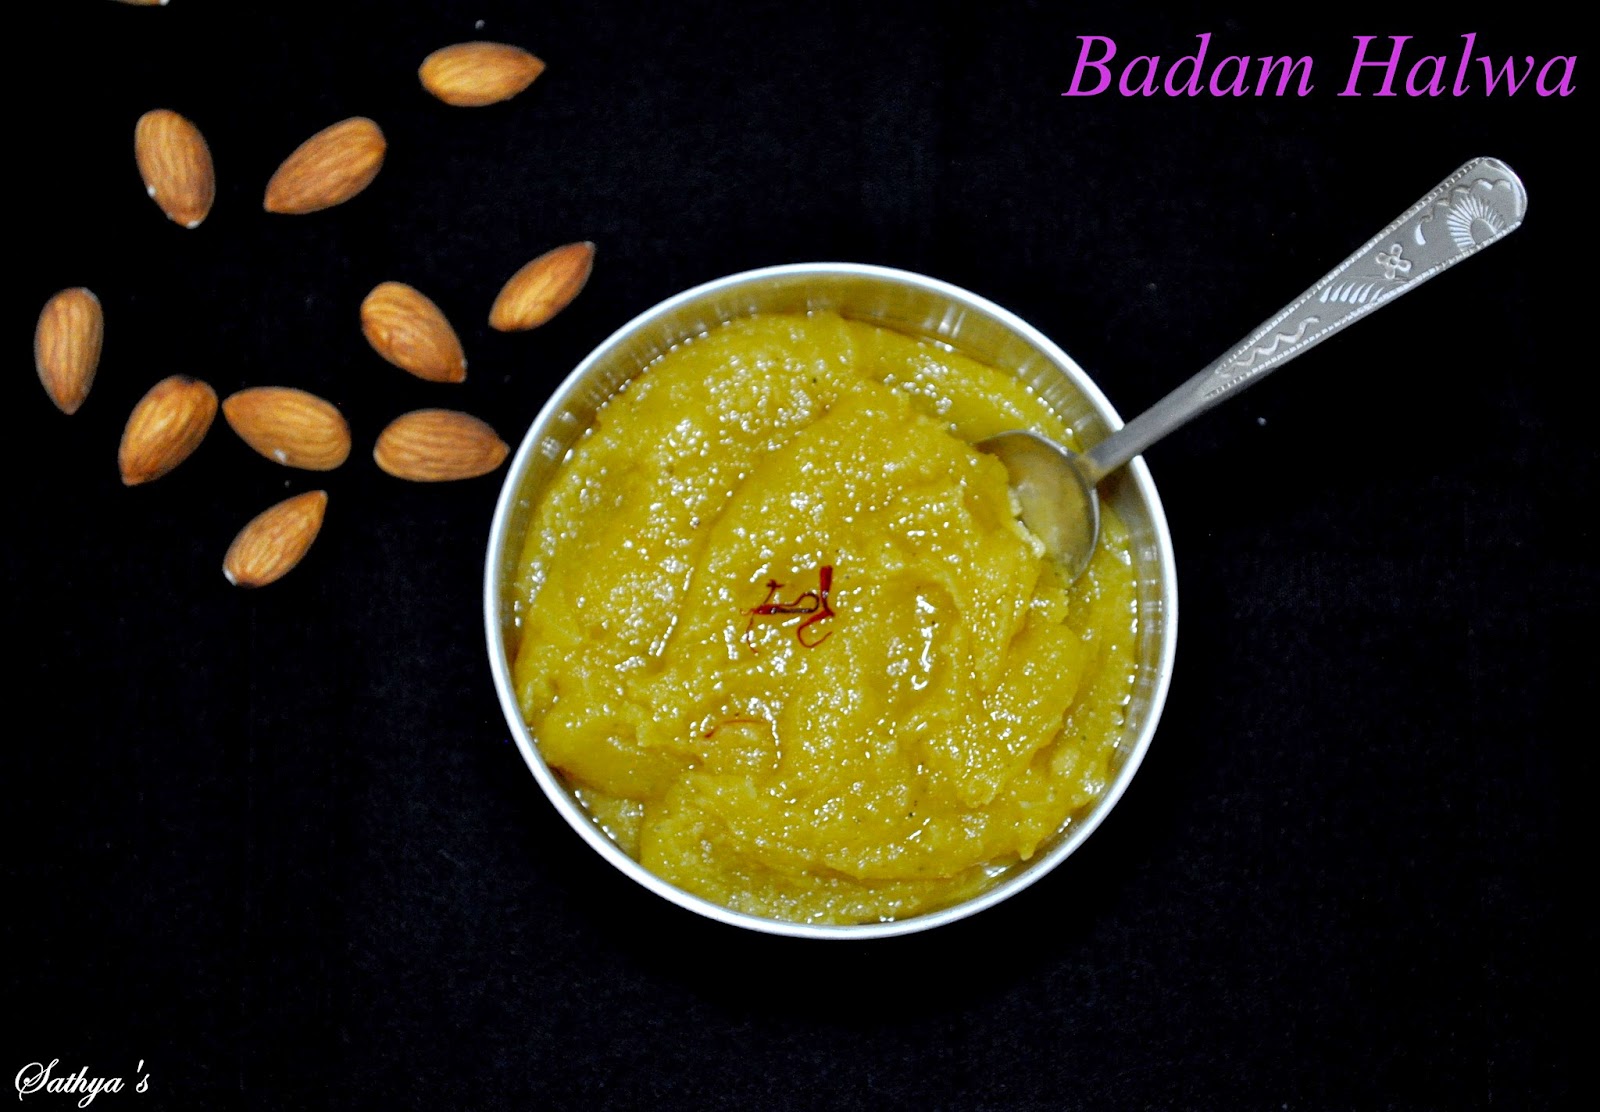
Let me start my blog with a rich and delicious sweet made with almonds, saffron, milk, ghee and sugar. The key ingredient of this sweet is almond.

Almond is said to have originated from Middle East. It was spread by humans in ancient times along the shores of the Mediterranean into northern Africa and southern Europe and more recently transported to other parts of the world. Almond is highly nutritious and is a rich source of iron, calcium, Vitamin B6, Vitamin E ans also rich in dietary fiber, monounsaturated & polyunsaturated fats which may lower LDL cholesterol.

This sweet is so yummy and also very easy to prepare. The only time consuming part is soaking & peeling off the skin from almonds. 

Badam Halwa Recipe

Preparation Time : 2 hrs | Cooking Time : 25 mins | Serves : 2
Category : Sweet | Cuisine : South Indian

Ingredients

Badam(Almond) - 1/2 cup
Sugar - 3/4 cup
Water - 1/2 cup
Ghee(Clarified butter) - 6 tbsp
Milk - 1/8 cup + 1/8 cup
Cardamom powder - a pinch
Saffron - a tiny pinch
Yellow food color - a tiny pinch

Method

1. Soak almonds for 3 hrs. Then peel off the skin and make it ready.  

2. Then grind the almonds along with 1/8 cup of milk to a semi coarse paste. Take another 1/8 cup of warm milk, add crushed saffron and the yellow food color to it.

3. In a non sticky pan, add sugar with water and let it boil until sugar completely dissolves (no need to check string consistency). Then add the ground almond paste to it and stir it continuously in medium flame to avoid lumps. Once it is completely blended with the sugar syrup, add saffron milk and mix well. Also add cardamom powder now. 

 4. Keep stirring in low flame for 5mins. It will start to splutter. Then add a tsp of ghee at regular intervals stirring continuously. At one stage spluttering will stop, ghee will be completely absorbed and the halwa will start leaving the sides of the pan. At this stage small white bubbles will start appearing. This is the right stage, to switch off. Badam halwa thickens with time.

 Cool down and store it in a container. You can also wrap it in a wax paper for single servings. Then what are you waiting for? Your yummy badam halwa is ready to taste now:) Enjoy the royal indulgence!!

Points to be noted
  • If you want to peel the almonds instantly, then add it to the boiling water for 15 mins, then cool down and start peeling.
  • Keep stirring continuously as it gets burnt easily.
  • Use a non sticky pan to avoid burning and sticking. Also adding ghee at regular interval avoids sticking. Be generous in adding ghee.
  • Adding ghee is very important for this halwa. If you are more diet conscious & concerned about the ghee, please do not make this sweet, as it will not come out well with proper consistency if you reduce the amount of ghee.
     
  • Be careful at the stage when it starts to splutter.
     
  • You have to switch off, once the halwa starts leaving the sides of the pan & in a semi solid state. It keeps well for a week if refrigerated. Always use a clean spoon.


Paal Kozhukattai (With Jaggery + Coconut milk)


Paal Kozhukattai is one of the authentic Chettinad recipes. It can be made with either jaggery or sugar according to the preferences. But preparing it with jaggery is the traditional way of making this recipe. The rice dumplings blended with the coconut milk and jaggery tastes heaven. Here comes the recipe...

PAAL KOZHUKATTAI RECIPE

Preparation Time : 20 mins | Cooking Time : 20 mins | Serves : 4
Recipe Category : Dessert | Recipe Cuisine : South Indian

Ingredients : 

For making Kozhukattai Dough:
Rice Flour - 1 cup
Water - 1 cup
Milk - 1 cup
Ghee - 1 tsp
Salt - 1/2 tsp

For the milk sauce:
Jaggery (powdered) - 1 cup
Milk - 1 cup
Water - 1/2 cup
Coconut (Shredded) - 3 tbsp
Coconut milk - 1 cup
Cardamom Powder - 1/2 tsp

Method:

1. Dissolve jaggery with immersing level of water. Heat it up till jaggery is dissolved completely and switch it off once you see the bubbles. Strain it to remove the impurities and keep aside. 

2. In a mixing bowl add the rice flour, salt, milk & water and mix well without lumps.

3. Now heat a tsp of ghee in a nonsticky pan and pour the mixture to it. Keep stirring till you get a dough consistency. Switch it off once you get the dough consistency.

4. Allow it to cool for a shortwhile. When it is warm knead it to a smooth dough. Now form small balls or elliptical shaped out of the dough based on your preference. Make sure to always cover it with a wet cloth to prevent it from drying. 

5. Once you make all the balls, start to prepare the milk sauce. For making it heat milk and water in a heavy bottomed pan. When the milk starts to boil, add the balls to it and keep the stove in low flame and close it with a lid. The ball will raise slowly once it got cooked. Allow it to cook till it becomes soft. Stir it now & then carefully without breaking the balls. Meanwhile prepare the coconut milk & keep it ready.

6. Once the balls are soft and cooked add the coconut milk and give a quick stir. Then add the prepared jaggery syrup to it & give a stir. Allow it to cook in low flame for 3 mins. 

7. Add cardamom powder & Shredded coconut and switch off the flame in 2 mins. 

Make it to rest for 20-30 mins for the sauce to get well blended with the balls. Serve warm/cold.

Points to be noted:
  • Do not over cook after the coconut milk & jaggery syrup are added. It may curdle.
  • You can even cook the balls in hot water & then add them to the milk sauce to save time. 
  • If you don't prefer to add jaggery, you can even replace it with sugar with the same process. 
  • Always cover the dough & the balls with wet cloth to prevent them from drying. 


Baby Corn Manchurian


Baby corn Manchurian is an Indo-Chinese appetizer dish. It can be made either dry or semi gravy depending upon our preference. I made this recipe dry as we like that way. It is a best combo for Fried rice or noodles. Here comes the recipe...


BABY CORN MANCHURIAN RECIPE:

Preparation Time : 10 mins | Cooking Time : 20 mins | Serves :4
Category : Sidedish | Cuisine : Indo Chinese

Ingredients 

For the batter & frying
Baby corn -10
All purpose flour/maida -1 1/2 tbsp
Cornflour -2 tbsp
Red Chilli powder -3/4 tsp
Ginger garlic paste -1/2 tsp

Oil - for frying
Salt to taste

  
For the Manchurian
Soya sauce - 2 tsp
Red Chilli Sauce - 2 tsp
Tomato Sauce - 1 tbsp
Cornflour - 1 tbsp + 1/4 cup water
Garlic - 4 cloves
Onion -3/4 cup
Green chilli -1
Capsicum -1 medium size
Spring onion greens -2 tbsp chopped

Pepper dust to taste
Oil -2 tbsp
Spring Onion (chopped) - for garnishing
  
Preparation 

1. Wash and cut the baby corn into 2 or 3 pieces.

2.  Boil the water and add baby corn to it and add some salt needed and then switch off the flame and keep it covered for 10 minutes. Meanwhile finely chop the onions, green chillies, garlic & capsicum.

3. Drain the water completely. Now add cornflour, all purpose flour(maida), chilli powder, ginger garlic paste & salt to the baby corn and mix it well. Marinate it for 15 minutes. 

4. After 15 minutes, heat the oil and deep fry the baby corns. Remove from oil and place it on a paper towel to drain excess oil.

5. Now heat 2 tbsp of oil in a pan, add finely chopped garlic and saute it.

6. Then add onions, green chilli, salt needed and saute well. Then add capsicum, spring onion greens and cook for a few more minutes on high flame stirring continuously.

7. Add soya sauce, red chilli sauce, tomato sauce, pepper powder, add little water and cook on high flame for 5 seconds and add the baby corn and mix well until it is well coated with the sauce. 
8. Garnish it with chopped spring onion greens and serve hot.

Points to be noted:
  •  Make sure not to over cook capsicum & onions while sauting. They should be crunchy. 


Carrot Kheer


Carrot Kheer/Payasam is one of the delicious and also a nutritious dessert. This dessert can be prepared easily and consumes less time. It can be served hot or chilled. But I prefer to have it chilled:) This dessert is more suitable for small parties. You can even prepare this a day before & refrigerate it. What a lovely color it is!! Come on..lets get into the preparation of this Kheer.

Carrot Kheer Recipe

Preparation Time : 10 mins | Soaking Time: 1/2 hr | Cooking Time : 15 mins | Serves : 3
Category : Dessert | Cuisine : Indian

Ingredients
 Carrots - 2 medium sized (grated)
 Milk - 1/2 liter
 Sugar - 4 tbsp
 Ghee - 1 tsp
 Cashews - 6
 Almonds - 6
 Cardamom powder - a generous pinch
 Saffron - 4 strands
 Broken cashews - few for garnishing

Method

1. Soak the almonds and cashews in warm water for half an hour. Remove the skin of almonds. Grind both almonds and cashews together coarsely. Soak saffron strands in a tbsp of warm milk for 5 mins.


2. Wash and remove the skin of the carrots and grate them using the blade with small holes.

3. Heat a tsp of ghee and fry the cashews. In the same pan add the grated carrots and saute it till the raw smell leaves.

4. Boil the milk in medium flame and keep stirring in between till it reduces in volume.

5. Now add the carrots and cashew-almond paste to the boiling milk. Cook for few more minutes stirring in between so that the carrots are cooked well.

6.  Add sugar and give it a quick stir.

7. Add cardamom powder & saffron soaked milk. Garnish it with fried cashews.

Serve it hot or chilled as per your choice. 

Chicken Gravy


Whenever I come across the word Chicken gravy, the first thing that comes to my mind is my Mom's oil oozed Naatu Kozhi (Farm raised fresh organic chicken) Kuzhambu. The skin of the chicken is burnt which gives a nice smoky flavor to the gravy. Longing for it badly:( Here in US, I used to buy farm raised organic chicken in a Natural grocery shop. But it is no more near the taste of Naatu kozhi in my hometown.


I usually prepare chicken gravy in an old fashioned method without adding garam masala, as my Mom cooks that way. But for a change, I tried this chicken gravy in a different method for today's lunch. It came out too good. Couldn't wait to share this recipe with you all. Here comes the recipe..

Chicken Gravy Recipe

Preparation Time : 10 mins | Cooking Time : 30 mins | Serves : 3
Category : Side dish | Cuisine : South Indian

Ingredients

Chicken with bones - 1/2 kg 
Big Onion -  1
Shallots - 10
Tomato - 1
Green chilli - 1 slitted
Ginger garlic paste - 1 tbsp
Garam masala powder - 1 tsp
Turmeric powder - 1/4tsp
Red chilli powder - 1 tsp
Coriander powder - 1/2 tbsp
Coriander leaves (Cilantro) -  few chopped
Salt - to taste
Water - 1 cup 

To Grind
Fennel seeds - 1/2 tsp
Pepper corns - 1/2 tsp
Split roasted gram (Pottukadalai) -1/2 tsp
Cashew nuts - 3
Fresh grated coconut - 1/4 cup minus 1 tbsp
Yogurt - 2 tsp

To Temper
Cloves - 2
Cinnamon - 1/2 inch piece
Bay leaves - 1/2
Curry leaves - a sprig
Gingelly oil - 2 tbsp

Method 

1. Clean and wash the chicken. Marinade the chicken with a tsp of yogurt(curd), turmeric powder & salt. Set aside.

2. In a pressure cooker heat the oil and add the items listed under "To temper" and saute it for 2 mins. Then add ginger garlic paste & saute till the raw smell leaves. Add onions & green chilli. Once the onions are sauteed well, add the tomato. Fry it till it becomes mushy.

3. Now add the chicken and give it a quick stir. Then add garam masala, red chilli & coriander powders. Fry them well for 5 mins.

4. Add a cup of water & required salt and pressure cook for 3-4 whistles.

5. Meanwhile grind the ingredients to a smooth paste, given under "To Grind" and keep it ready.

6. Once the pressure releases, add the ground coconut paste to the gravy and mix well.

7. Now reduce the flame to medium low and allow it to boil for 10 mins till the oil separates.

8. Add the chopped coriander leaves and switch of the stove.

Serve hot with steamed rice / rotis / dosas.

Points to be noted
  • Whenever you are preparing any dish with chicken, don't forget to marinade it with turmeric powder & salt atleast for 10 mins. It helps to remove the bacteria and raw smell of the chicken.
  • Also use Gingelly oil for cooking any kind of chicken gravy. It adds a special flavor to it.


Monday, May 4, 2015

Nei Urundai ( Moong Dal Laddu )

Nei Urundai / Moong Dal Ladoo is a very healthy sweet, especially for kids and also easy to prepare. Trust me kids will surely like this sweet. Moong dal is a good source of low-fat protein and high in dietary fiber. Containing a broad array of essential vitamin & minerals, it is also rich in potassium, calcium, folate & vitamin B. Now lets get into the preparation of this nutritious sweet.
 Nei Urundai Recipe

Preparation time : 15 mins | Cooking time : 7 mins | Serves : 4
Recipe Category : Sweet | Recipe Cuisine : South Indian

Ingredients

Moong Dal - 3/4 cup
Roasted gram dal - 1/4 cup
Sugar - 3/4 cup
Cardamom - 2 pinches
Cashews - few
Melted ghee - 1/4 cup + 2 tbsp

Method 

1. In a pan add a tsp of ghee and fry the cashews till it turns golden brown. Set aside.

2. In the same pan, dry roast moong dal in low medium flame till it turns golden brown and a nice aroma comes. Allow it to cool and grind it to a fine powder.

3. Same way dry roast the roasted gram dal till it slightly turns brown and grind it to a fine powder.

4. Grind sugar to a fine powder.

5. Sieve moong dal powder, roasted gram dal powder and sugar all together to discard the grainy particles and transfer them to a bowl.

6. Now add the fried cashews & cardamom powder to the powdered items in the bowl and mix them all evenly.

7. Heat the ghee and add it little by little to the dal powders and mix them well with a laddle. Allow it to rest until it becomes warm. And shape them into laddus.

These laddus keep well for 2 weeks at room temperature.

Points to be noted

  • Be careful while roasting the dals, take care not to burn them.
  • Add ghee little by little to form laddus. If you are able to form laddus then stop adding ghee.

Kothamalli(Cilantro) Chutney


Cilantro is a rich antioxidant and also have antibacterial effect against Salmonella. It is also used to detoxify the lead content in our body.
Coriander(Cilantro) chutney is more flavorful and an apt side dish for any kind of Dosas, Adai and also for Idly. I borrowed this recipe from my mom. It is so easy to prepare even for beginners in cooking and also consumes less time. I love the bright green color of this chutney than its taste:)

Kothamalli Chutney Recipe (With coconut)

Preparation time : 10 mins | Cooking time : 7 mins | Serves : 3
Recipe Cuisine : South Indian | Recipe Category : Side dish

Ingredients

Coriander leaves(Cilantro) - 1/2 bunch (if big)
Grated coconut -  2.5 tbsp
Urad dal - 1 tbsp
Green chillies - 2
Tamarind - a small pinch
Oil - 2 tsp
Salt - as needed

Method

1. Clean and wash the coriander leaves and remove the thick stems. Keep aside.

2. Grate the coconut and keep it ready. Soak the tamarind.

3. Heat 2 tsp oil in a kadai and add urad dal to it & fry till it turns golden brown. Then add green chillies to it and give a quick stir.

4. Now reduce the flame to low & add the coriander leaves to it and saute it till it reduces in volume. Also make sure not to change the color of the leaves.

5. Finally add the grated coconut & give it a quick stir and switch off the stove.

6. Grind all the sauteed items along with the soaked tamarind, salt and little water.

Coriander chutney is now ready to serve with hot Idlies or dosas.

Points to be noted
  • Coriander leaves gets cooked very soon. So switch off the stove as soon as it shrinks in volume. If you saute it for more time, the color & taste of the chutney will be spoiled. 
  • If you want more spicy, then add green chillies according to your taste.
  • If you want coriander mint chutney, add mint leaves along with the coriander leaves in equal ratio and follow the same method.


Plantain (Vazhaikai) Fry


Vazhaikai(Plantain) Fry is a best combo for Sambar, rasam or any dishes made with dal. I got this recipe from one of my family friend. Its one of my favorite side dishes. I can even have it as a main dish:) This recipe can be used for making baby potato fry too.

Preparation Time : 10 mins | Cooking Time : 15 mins | Serves :2
Category : Side dish | Cuisine : South Indian

Vazhaikai(Plantain) Fry Recipe
 Ingredients
 Raw Banana(Plantain) - 1 medium sized
 Big Onion - 1/2 roughly chopped
 Red chilli powder - 1/2 tsp
 Turmeric powder - 1/4 tsp
 Fennel seeds(Sombu) - 1 tsp
 Mustard - 1/4 tsp
 Oil - 2 tbsp
 Salt as needed


 Method 

1. Peel off the skin and cut into thick/thin slices shaped circle or semicircle. Cook the slices in   microwave oven for 3-4 mins or you can also boil it in a cup of water until soft.

2. Grind the chopped onion, Fennel seeds, red chilli powder, turmeric powder, salt all together.

3. Heat oil in a non sticky pan and put the mustard seeds & let it splutter.

4. Now add the ground masala to it and saute for 3 mins till the raw smell leaves.

5. Add the cooked plantain slices to the masala and saute it for 2 mins in medium flame till its well   coated. Turn the flame to low till it gets toasted well.

Serve it with Sambar or Rasam rice.

Note 
  • You can use this same recipe for potato or baby potato fry.


Sunday, May 3, 2015

Mutton Pepper Fry


Mutton Pepper Fry is a very tasty non-veg dish, especially for mutton lovers. It goes well with rice, rotis & dosa. It tastes too good when you have it 3 or 4 hrs after it was prepared. Here comes the recipe..

Mutton Pepper Fry Recipe

Preparation time : 15 mins | Cooking time : 45 mins | Serves : 4
Recipe Category : Side dish | Recipe Cuisine : South Indian

Ingredients

Mutton - 250 gms
Big Onion - 1
Tomato - 1
Green chilli -1
Ginger garlic paste - 1.5 tsp
Red chilli powder - 1/2 tsp
Coriander powder - 1/2 tsp
Garam masala powder - 1/4 tsp
Turmeric powder - 2 pinches
Cumin powder - 1/2 tsp
Pepper (whole) - 2 tsp
Coconut - 1 tbsp
Cilantro for garnishing
Salt as needed

For tempering
Oil - 3 tsp

Mustard seeds - 1/4 tsp
Fennel seeds - 1/2 tsp

Bay leaf - 1
Curry leaves - a sprig
Cloves - 3
Cinnamon - 2 small pieces
Cardamom - 1


Method

1. Clean the mutton well and cook it in pressure cooker for 7 whistles or till your mutton is cooked well.

2. Meanwhile chop the onions, tomatoes and keep all the spices ready needed for tempering.

3. Shred the coconut & grind the pepper corns coarsely and keep them ready.

4. Heat the oil and temper it with all the items given under To Temper.

5. Now add the ginger garlic paste & saute it till the raw smell leaves. Add chopped onions, green chilli & after it becomes glossy, add tomatoes & saute it till it becomes mushy.

6. Add cumin powder, coriander powder, chilli powder, turmeric powder, garam masala powder and saute well till the raw smell leaves.

7. Now add the cooked mutton pieces to it along with the water in the cooker. Add salt.

8. Let the mutton blend well with the masala in medium flame. Wait till the water evaporates.

9. Once the mutton becomes dry, add the shredded coconut and the freshly ground pepper powder and give it a quick stir.

10. Switch off the flame and garnish it with cilantro.

Points to be noted
  • Whenever you cook the mutton, add a tsp of curd & a piece of ginger so that mutton becomes soft. Also add a pinch of turmeric powder.
  • The above said quantity yields a medium spice level. Adjust the spice level according to your taste preference.
  • I switched off the fry before it became very dry, as we want to have it with rice. If you just want to have it as a side dish, stir further till it becomes too dry like chukka.


Malai Kofta


Malai Kofta is a rich North Indian gravy made for special occasions. Malai means cream and Kofta are fried dumpling balls. Koftas are added to richly flavored tomato cream base sauce. It goes well with Naan or any other rotis & even jeera rice. Though its a very rich gravy, you can have it guilt free as its made very occasionally:)

Malai Kofta Recipe

Preparation Time : 25 mins | Cooking Time : 30 mins | Serves : 2
Category: Sidedish | Cuisine: North Indian

For the kofta:

Mixed Vegetables - 1/2 cup (carrot, peas - cooked and mashed)
Potatoes (cooked and mashed) - 3/4 cup
Paneer - 1/2 cup
Onion - 2 tbsp finely chopped
Coriander powder - 1 tsp
Jeera Powder - 1/2 tsp
Turmeric powder - a generous pinch
Red Chilli powder - 1/2 tsp
Nuts - 2 tbsp chopped (Almonds,pistachios & cashews)
Coriander leaves - 1 tbsp finely chopped
Bread crumbs- 1/4 cup
Salt - to taste

For the Malai:

Onion (big sized) - 1
Tomatoes (big sized) - 3
Red Chilli powder - 1 tsp

Garam masala powder - 1/2 tsp
Milk - 1 cup

Fresh Cream - 1/2 cup
Cashew paste - 2 tsp
Kasoori Methi - 1/2 tsp crushed
Coriander leaves - 1 tbsp finely chopped
Salt - to taste

 For tempering

 Shahi jeera - 1/2 tsp
 Ginger garlic paste - 1 tsp

 Method 

1. Pressure cook the veggies (carrot,peas) for 2 whistles.

2. Drain the excess water and make sure there is no moisture in it and mash it up.

3. Pressure cook potatoes until mushy. 

4. Grate the paneer and reserve little grated paneer for garnishing, while serving.

5. Now add all the ingredients listed under 'For the kofta' to the cooked veggies and mix them well. 

6. Combine them all to a thick dough just like we make for veg bonda. If the dough is loose add little bread crumbs to it.

7. Form lemon sized balls and deep fry them in oil, till it turns golden brown.

8. In a non-sticky pan add onions and tomatoes, saute them well. Then add the red chilli powder and garam masala powder to it and saute till raw smell completely leaves and it shrinks in volume.

9. After cooling, grind it to a smooth paste and set aside.

10. In a pan heat oil and add shahi jeera to it. After it crackles, add ginger garlic paste to it and saute till the raw smell leaves. Now add the ground tomato onion paste to it, add 3/4 cup of water.

11. Allow it to cook till it becomes thick and add required salt. Then add fresh cream and keep stirring.

12. Once the gravy gets thick, switch the stove to low flame and add milk little by little stirring continuosly to avoid curdling. Add kasoori methi. Switch off the flame.

13. Now add the fried koftas to the gravy. Garnish it with grated paneer, and coriander leaves.

Serve hot with any rotis or pulao.


Points to be noted 
  •  I didn't add any food color to my gravy. If you want a restaurant look, you can add food color to it.
  • You can have guilt-free koftas by toasting it in paniyaram pan, adding little oil instead of deep frying.
  • Don't add the refrigerated milk directly to the gravy or else milk will start to curdle. Slightly warm it before adding and also stir it continuously.
  • For even more richer version, you can substitute milk with fully cream.
  • You can add veggies for the kofta of your choice. 
  • Don't add all the koftas to the gravy as it absorbs the gravy and becomes mushy. Add it only while serving. 
  • Don't skip kasoori methi, as it gives a nice aroma to the gravy. 
  • You can add the home made fresh cream or store bought ones. 


Red Chilli Chutney


Milagai chutney (Kaara Chutney) is one of the best combo for idly, dosa & paniyaram. This chutney can be made in a jiffy with less ingredients. It is more ideal for travel & also those who are on diet, as it is made without coconut. Its a fiery hot chutney, as red chilli is added as the main ingredient. Those who like spicy side dishes must give this a try. I'm sure you will have 2 more idlies extra than your regular diet:)

Red Chilli Chutney Recipe

Preparation time : 5 mins | Cooking time : 10 mins | Serves : 2
Category : Sidedish | Recipe : South Indian

Ingredients

To Grind:
Dry red chillies - 5
Shallots (small onions) - 20 nos or Big onion - 1
Garlic pods - 4
Tomato (small) - 1
Tamarind - a big pinch

Salt as needed

To Temper:
Olive oil / any cooking oil - 2 tsp
Sesame Oil - 2 tsp
Mustard seeds - 1 tsp
Urad dal - 1/2 tsp
Curry leaves - few


Method

1. Soak tamarind and extract the pulp.

2. Grind all the ingredients coarsely given under To Grind, along with the tamarind pulp.

3. Heat oil in a pan and temper mustard seeds, urad dal and curry leaves.

4. Transfer the coarsely ground paste to the tempered items and stir it occasionally in medium flame till the raw smell leaves.

Serve this fiery hot chutney with hot spongy idlies, dosas or paniyarams.

Points to be noted

  • If you want a less spicy chutney, you can reduce red chillies according to your spice level.

Raw Mango Pickle


Pickle / Oorukai is one of the common side dish available in all the South Indian homes. As mango is a seasonal fruit, they use to prepare it and preserve it for months in jars. Sun dried raw mangoes stay fresh & good even for a year. Mango pickle is one of the tasty, tangy and mouthwatering pickles among all the others & my favorite too. Its a great side dish for Curd(yogurt) rice, Sambar rice & variety rice.

Raw Mango Pickle Recipe

Preparation Time :1 day  | Cooking Time : 15 minutes
Category: Condiments | Cuisine: South Indian

Ingredients

Unriped sour Mangoes ( Medium sized) - 3
Sesame(Gingelly) Oil - 5 tbsp
Mustard seeds - 1 tsp
Curry leaves - 1 sprig
Red chilli powder - 4 tsp
Fenugreek (Methi) powder - 1/4 tsp
Hing(Asafoetida) - 1 tsp
Salt - as needed


Method

1. Wash the raw mangoes and wipe it well using a paper towel.

2. Cut the mangoes into small bite sized pieces and put them in a clean dry bowl. Discard the seeds.

3. Add salt to the mango pieces and mix them well. Refrigerate it for a day.

4. Next day, heat the oil in a wok. Add mustard seeds and allow it to pop, then add the curry leaves & 1/2 tsp hing.

5. (You can see some water left in the bowl, as we added salt to the pieces) Now add the mango pieces along with the water to the tempered items. Keep the flame in medium and allow it to cook for 10-15 mins  stirring occasionally.

6. Switch off the flame. Allow it to cool for sometime.

7. When it is warm, add the red chilli powder, fenugreek(methi) powder & 1/2 tsp hing, Salt and mix well. Store it in a clean, dry, air tight glass container.

Mango pickle is now ready to serve. Enjoy the tangy, hot & spicy mango pickle with Curd rice or Sambar rice.

Points to be noted:
  • You can even sun dry the cut mango pieces after adding salt, instead of refrigerating. If you do in this method shelf life of the pickle will be more.
  • The measure of chilli powder depends upon the sourness of mango. The above measurement yields a medium hot pickle. Adjust the quantity of chilli powder according to your spice level.
  • Adding solid hing adds more flavor to the pickle than the powdered one.
  • Don't skip adding Methi powder as its aroma is more needed for any pickle.
  • Also add the red chilli powder when the pieces are warm after swiching off the flame, or else the pickle will turn dark red or brown. 
  • Always use a clean, dry spoon. The shelf life of a pickle also depends upon proper handling.


Saturday, May 2, 2015

Mutton Briyani


Mutton Briyani!! is one of my most favourite dish and my staple order in any of the non-veg restaurants. Also I felt mutton briyani is yummier than the chicken. Most of our Sundays are not complete without briyani:) A plate of mutton briyani with onion raita makes a fantabulous feast:) Isn't it? I've tasted briyani in so many restaurants & also Hyderabadi briyani in some Andhra restaurants, but the one my Dad use to get from a Muslim briyani hotel in my native place, is the best one I've ever tasted. They use to make briyani only in Seeraga samba rice which adds more flavor than the Basmati.

I've tried briyani in so many methods. My mom makes briyani in a unique way. My husband prepares it in his own style. I'll post their recipes later. When I was searching the recipe for Dindigal thalapakatti Briyani, I came across this recipe and tried it. They use Seeraga samba rice, but in our place I get only Basmati. So tried it with that. To my surprise it came out extremely delicious. What are you waiting for? Try this recipe & make your Sundays more special with this yummy briyani:))

Mutton Briyani Recipe

Preparation Time : 25 mins | Cooking Time : 30 mins | Serves : 3
Category: Main | Cuisine: South Indian
Ingredients 

Basmati rice / Seeraga samba rice - 2 cups
Mutton - 1/2 kg (cleaned)
Onion - 1 large
Green Chilli - 2 slit
Ginger Garlic Paste - 3 tbsp
Chilli Powder - 2 tsp
Coriander powder - 1.5 tsp
Turmeric Powder - 1/2 tsp
Coriander Leaves (Cilantro) - 1/2 cup chopped
Mint Leaves - 1/4 cup chopped
Water - 2 cups
Coconut milk - 1 cup
Lemon juice - 2 tsp
Ghee - 2 tbsp
Oil - 3 tbsp
Salt to taste
 
For the Marinade:
Mutton - 1/2 kg (cleaned)
Thick Yogurt (curd) - 1/2 cup
Chilli powder - 1/2 tsp
Turmeric powder - 1/4 tsp
 
For the Briyani Masala Powder:
Cloves - 3
Cinnamon Stick - 2 inch piece 
Fennel Seeds (sombu) - 1.5 tbsp
Cardamom - 3
Star Anise - 1


To temper:
Bay leaves - 2 
Cloves - 2
Cinnamon stick - 1 inch piece
Cardamom -  1
Star anise - 1 
 
Method
1. Wash and soak the rice for 25 mins.
2. Meanwhile, marinade the cleaned mutton with curd, turmeric powder & chilli powder for 15 mins. Then pressure cook it for 15 mins (adding a cup of water) until it gets cooked well & soft.

3. Grind all the items given under For the briyani masala powder and set aside.

4. Now heat the oil + 1 tbsp ghee and temper it with bay leaves, cloves, cinnamon sticks & cardamom. Add the onions, green chillies and saute for few mins till it becomes slight golden brown and then add the ginger garlic paste and saute till the raw smell leaves.

5. Add in chilli powder, coriander powder, turmeric powder and the ground briyani masala powder and saute it for a minute.

6. Add the cooked mutton to the masala and saute it for 10 mins for the masala to get blended well.

7. Transfer the masala with mutton to the pressure cooker. Now add 2 cups of water + 1 cup of coconut milk, salt, lemon juice, chopped coriander & mint leaves and bring it to a boil.
8. In a pan, add a tsp of ghee and fry the soaked and drained rice for 2 mins carefully without breaking the rice. Now add the rice to the boiling items in the cooker.
 
9.  Cover the cooker with the lid and cook it in medium flame for 7 mins and reduce the flame to low for 5 mins. Switch of the stove and allow the steam to be released all by itself without disturbing it. Open the cooker once the pressure is fully released. Add a tbsp of ghee and fluff the rice with a fork or with the backside of a flat spatula.

Serve it hot with onion or cucumber raita.

Points to be noted
  • Cooking time of the mutton purely depends upon its quality & freshness. Meat from young goat cooks faster than the old one. Also the frozen mutton takes more time to get cooked. So decide the time of cooking depending upon the mutton you have.
  • I always use the fresh homemade ginger garlic paste, as it adds more flavor than the store bought ones. 
  • I prepared fresh coconut milk, but if you dont have time to prepare it you can use the readymade tinned one.
  • While sauting the onions, always add little salt to it so that it gets cooked fast.
  • Never try to release the pressure until it gets released by itself.
  • Cooking time for the briyani depends upon the stove you use. Mine is the coil stove. So I use to cook in medium high for just 8 mins and keep it in low for 5 mins as the heat will remain in the coil even after switching off.
  • After opening the lid, fluff the rice with a fork carefully without breaking the rice.
  • Frying the rice in ghee & adding lemon juice avoids stickiness of the rice.
  • If you want more mint flavor add more mint leaves. As we like a mild flavor, I added only little.